Using apiset.ai API in Cursor
Cursor is an excellent way to write code with AI—apply model-generated code with one click. A single prompt can update an entire class or function.
Step 1
Visit the Cursor website to download the client: https://www.cursor.com
Step 2
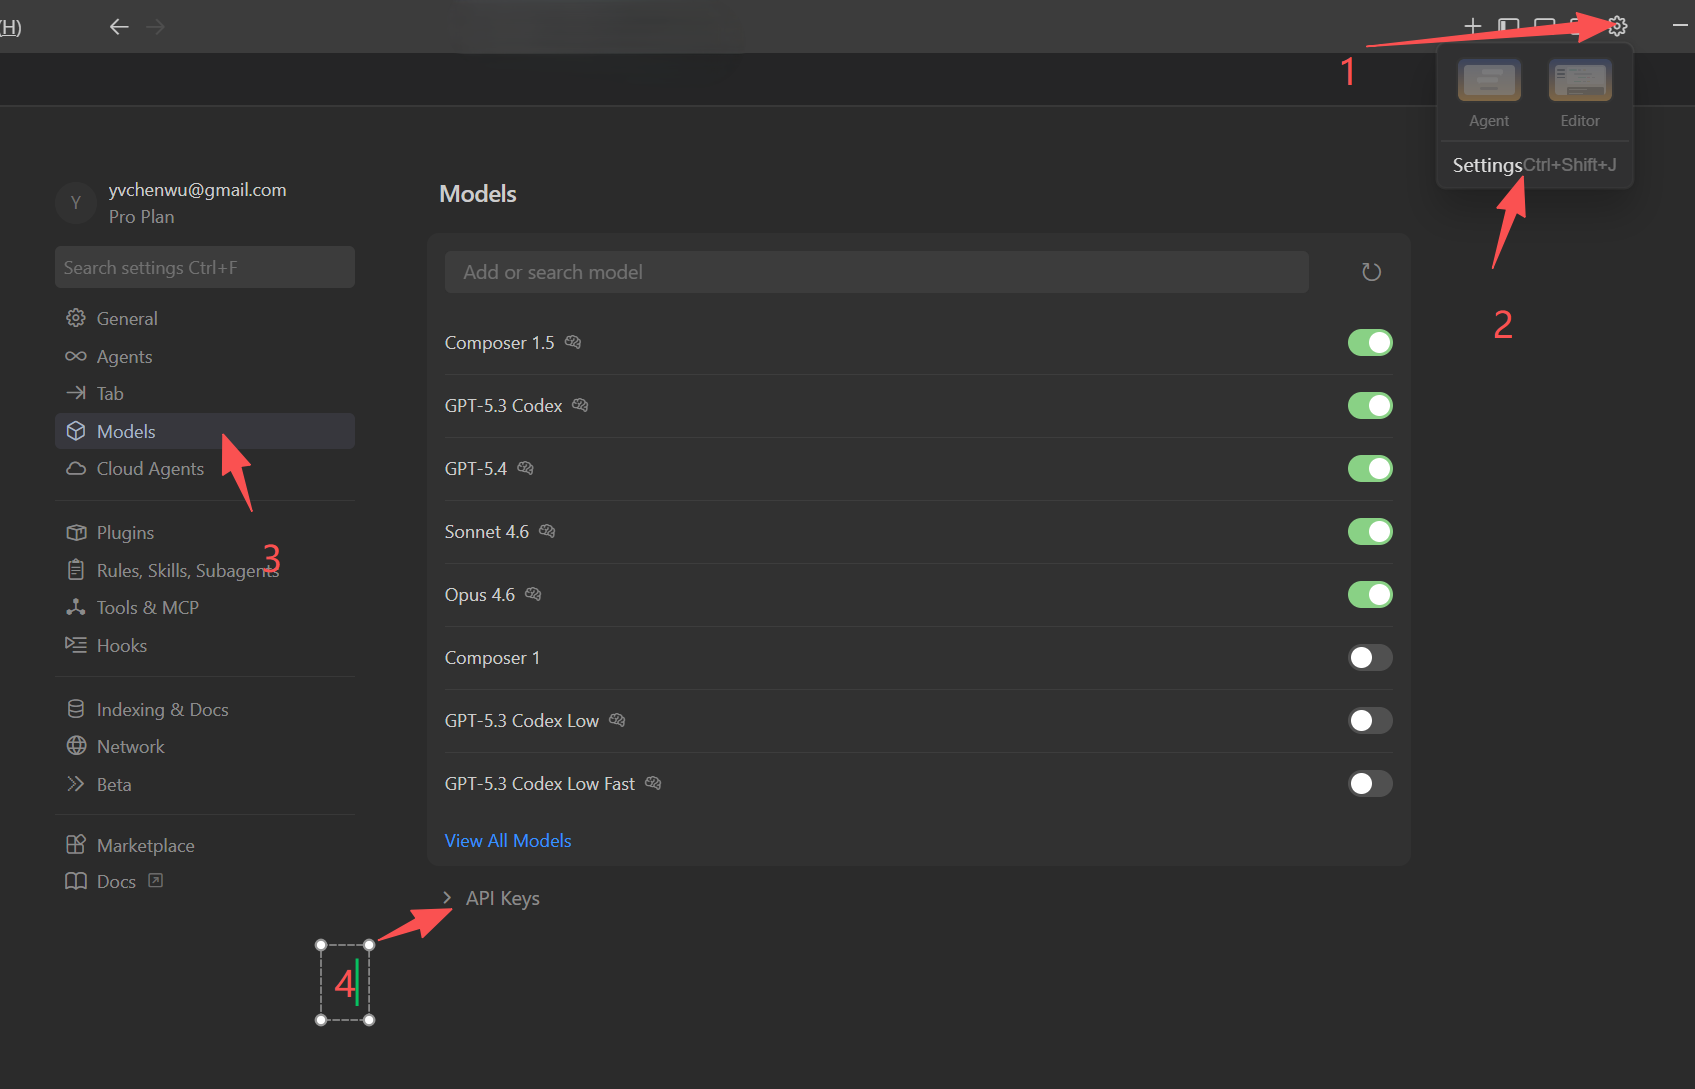
Open Cursor, click Settings in the top-right corner to enter the configuration page, as shown in the examples below.
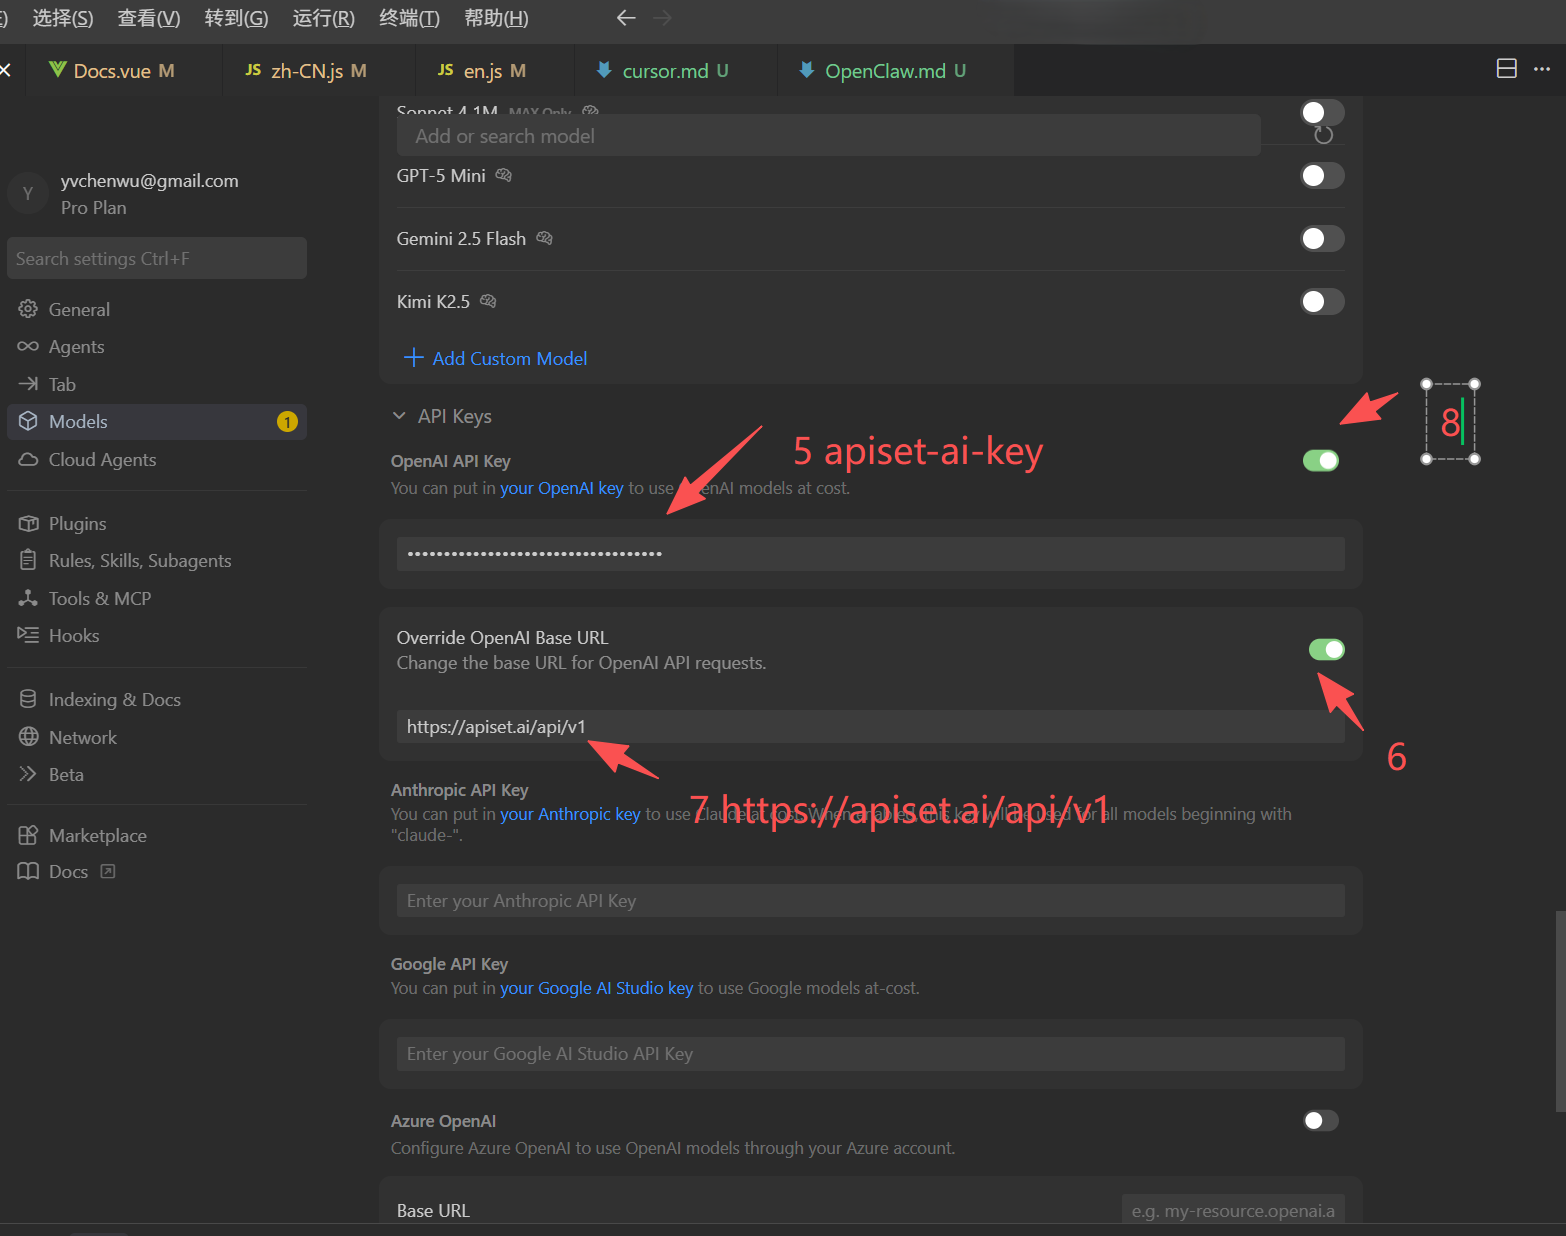
You only need to fill in two items:
- API Endpoint (OpenAI Base URL):
https://apiset.ai/api/v1 - Api Key: Go to the API keys page to create and copy your Api Key, then paste it into the Api Key input field.
Custom Model Notes
- Where to enter: Enter the model name directly in Cursor's model list.
- Format examples:
gpt-4o,deepseek-r1-all, etc. - Full model list: You can view supported model names on the Pricing page.
Configuration diagrams are as follows:
Open Settings
Configure API keys
- Step 8's checkbox must be checked, otherwise custom models will not work
Add Model
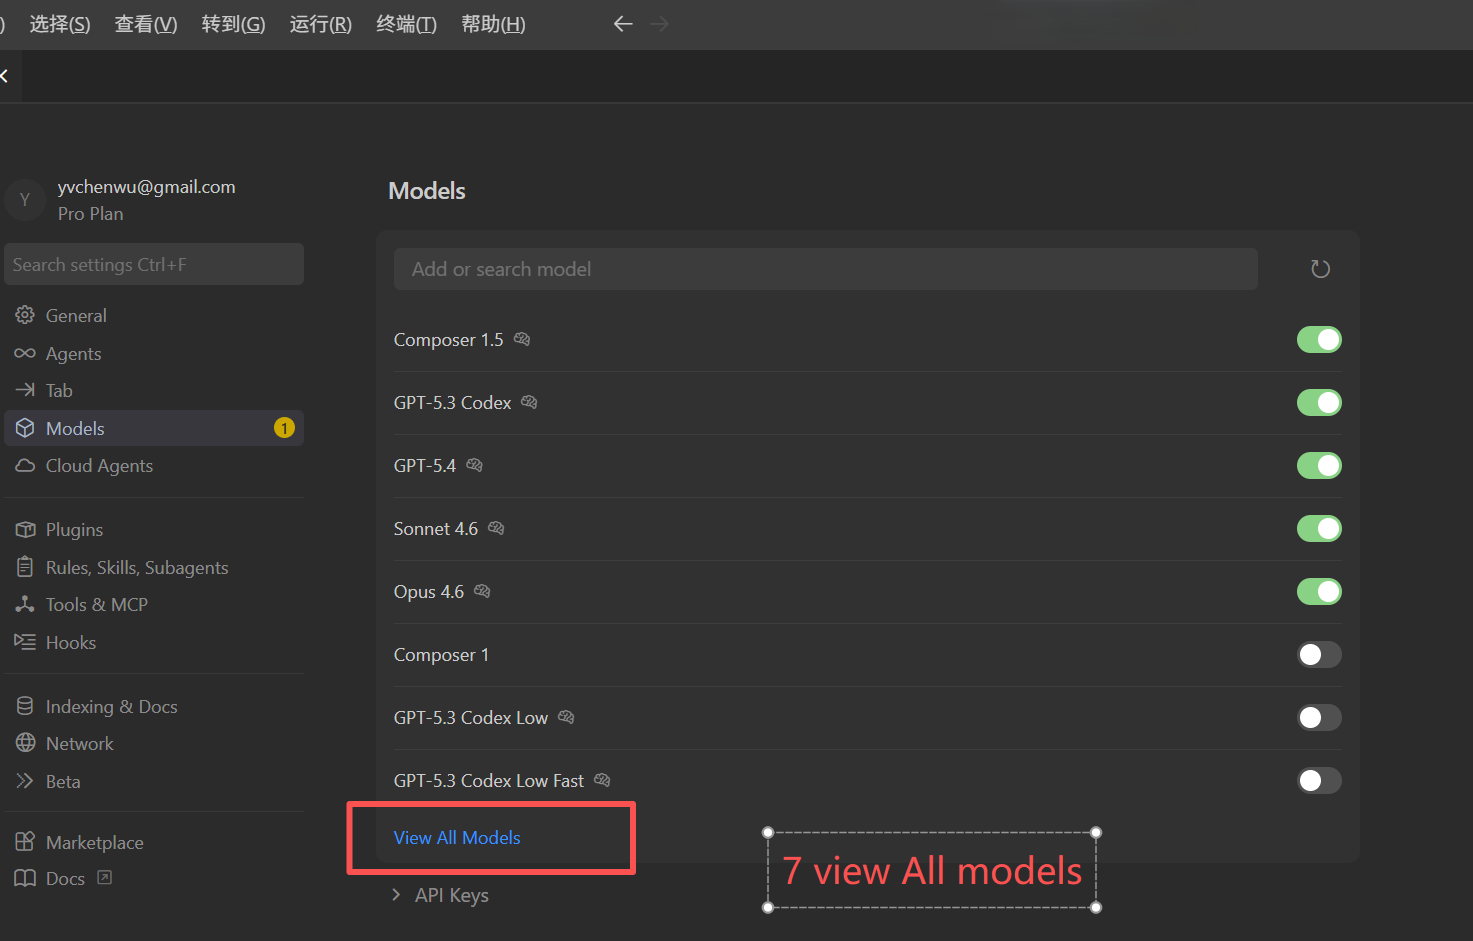
View All models
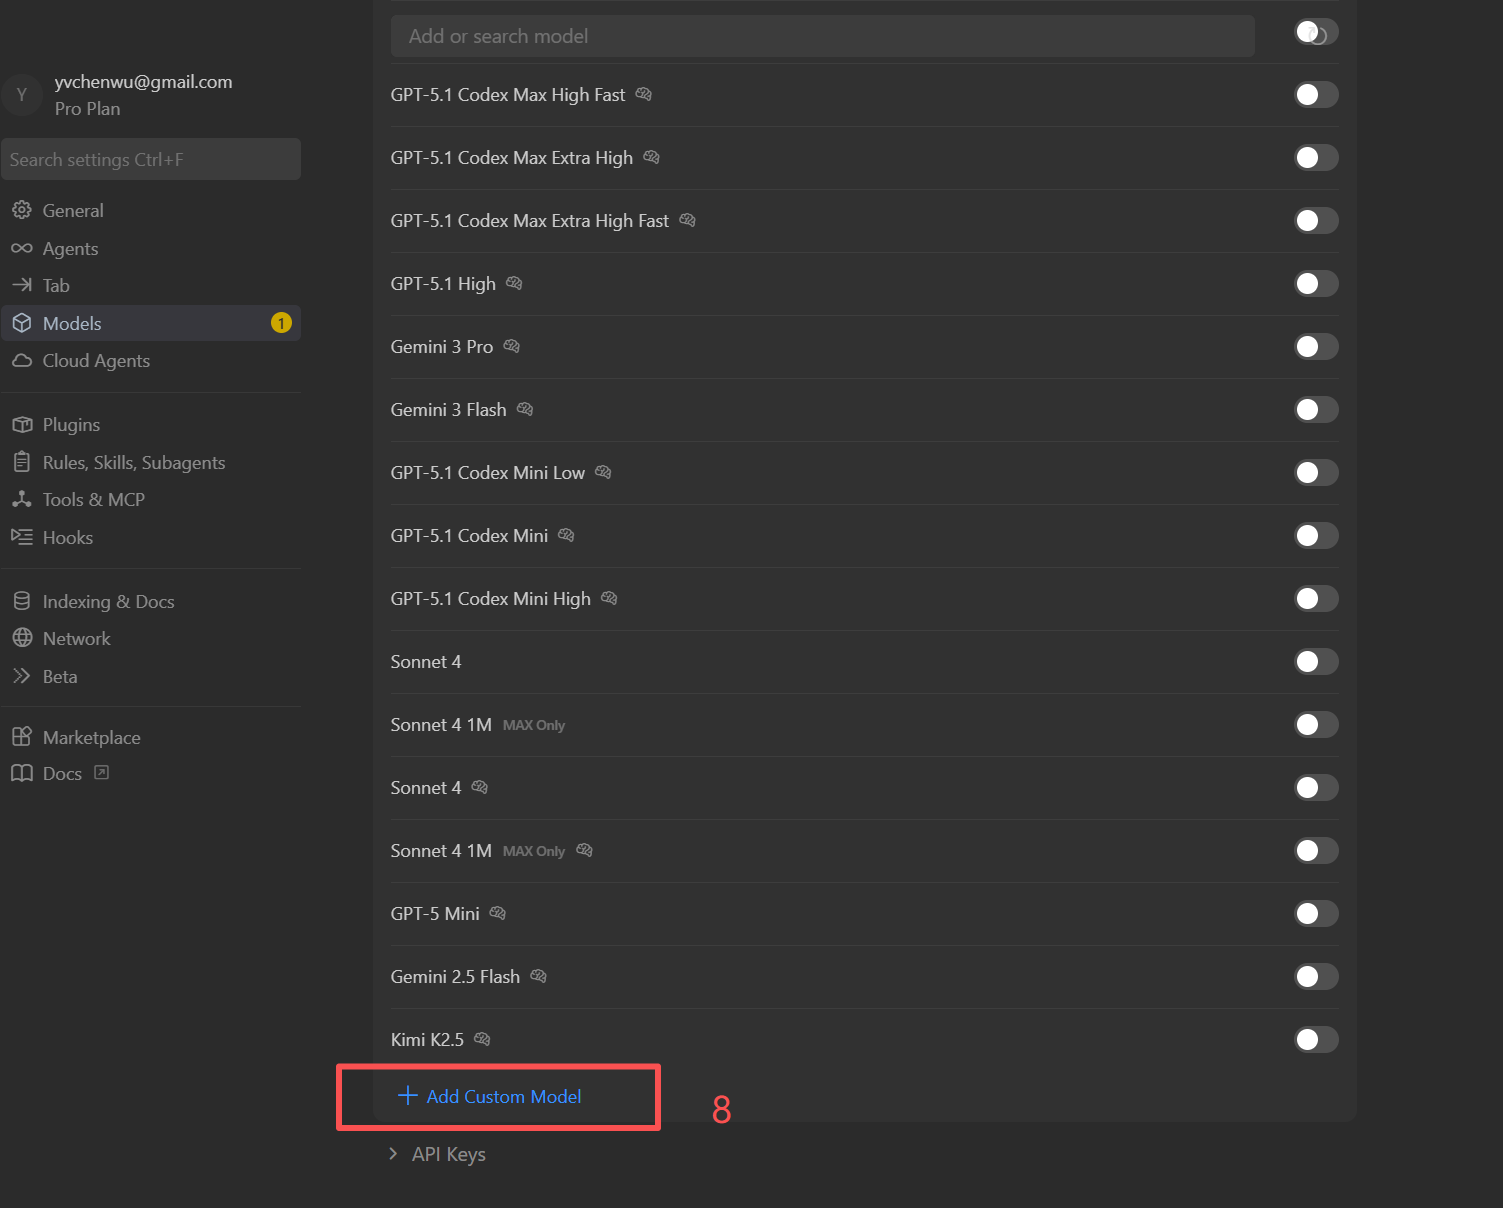
Add Custom Model
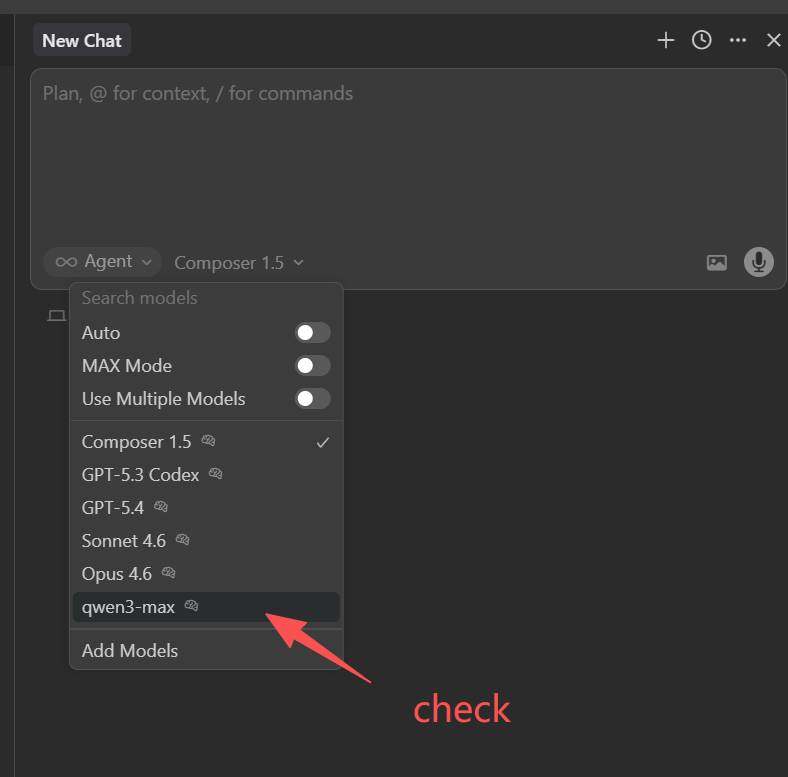
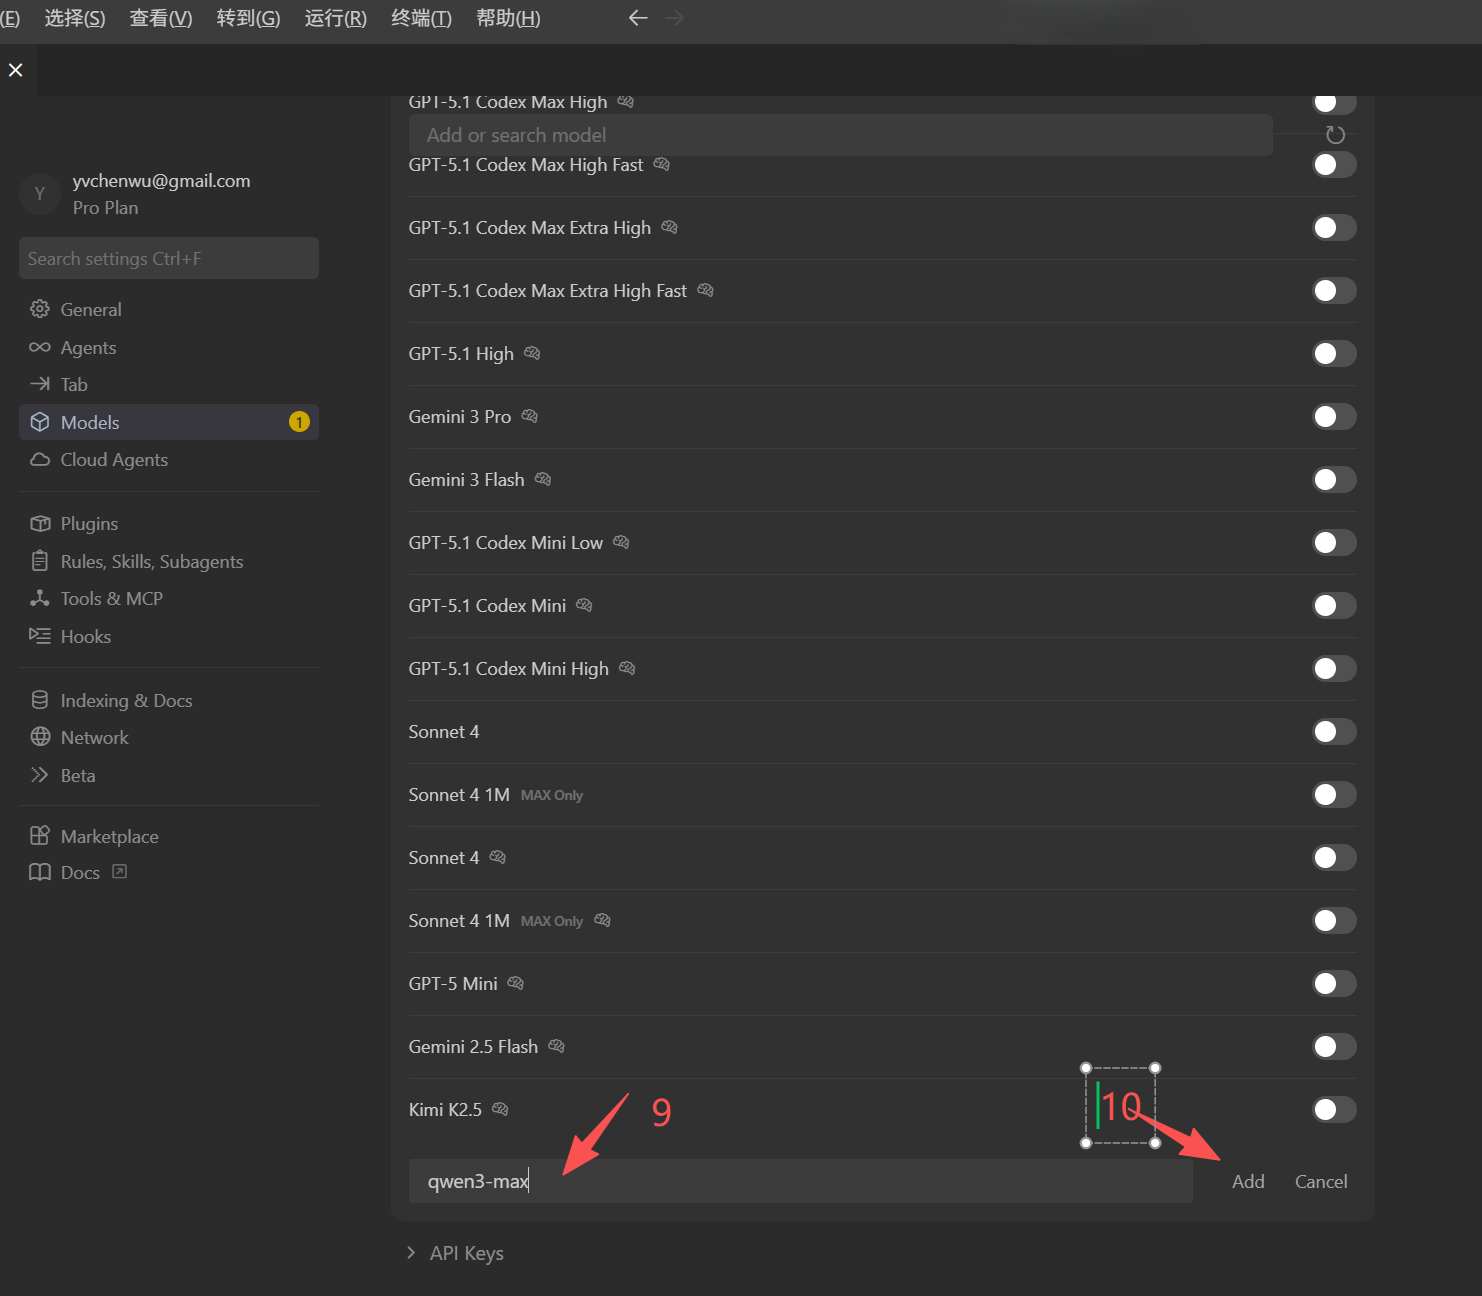 This demo uses qwen3-max. Other model IDs can be obtained from the Pricing page via the modelId field.
Uncheck Auto
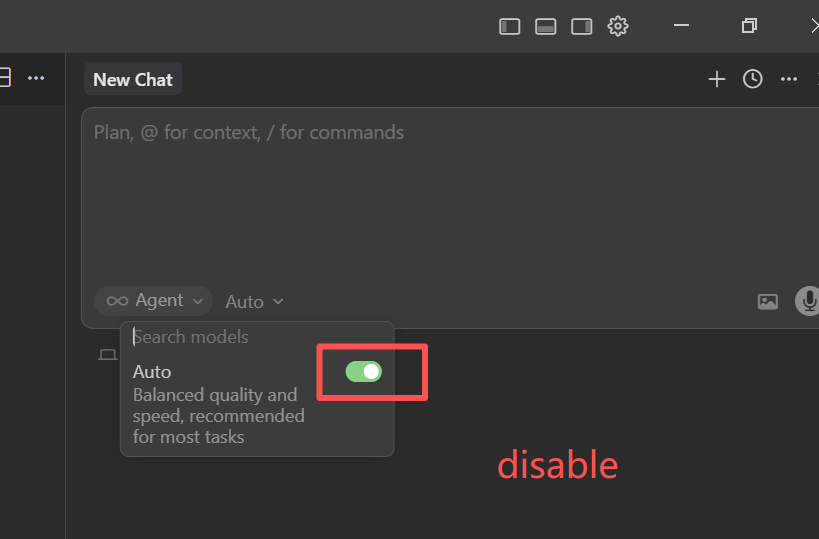
Check Custom Model